


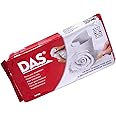
Air-Hardening Modeling Clay, 2.2 Lb. Block, White Color (387500)
Details
- BrandDAS
- ColorWhite
- Age Range (Description)Teen + Above
- MaterialClay
- Item Weight2.2 Pounds
- Number of Items1

Description
🎨 Sculpt your vision, no oven required!
- STRESS FREE CREATIVITY - Air-dries naturally—no kiln or oven required, saving time and hassle.
- MADE IN ITALY SINCE 1963 - Trusted craftsmanship with decades of expertise behind every block.
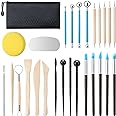
- VERSATILE ARTISTIC MEDIUM - Perfect for sculpting, molding, and crafting jewelry or décor with professional-grade smoothness.
- ENHANCES DEXTERITY CREATIVITY - Ideal for teens and adults to develop hand-eye coordination and artistic skills.
- GENEROUS SIZE FOR AMBITIOUS PROJECTS - 2.2 lb block ensures you have enough clay to bring your boldest ideas to life.
DAS Air-Hardening Modeling Clay is a premium 2.2 lb white clay block that air-dries naturally, eliminating the need for baking. Renowned for its smooth texture and pliability, it’s perfect for artists and hobbyists seeking a versatile, easy-to-use medium. Made in Italy since 1963, this clay supports creative projects ranging from detailed sculptures to decorative crafts, while enhancing dexterity and hand-eye coordination.
Specifications
| Brand | DAS |
| Color | White |
| Age Range (Description) | Teen + Above |
| Material | Clay |
| Item Weight | 2.2 Pounds |
| Number of Items | 1 |
| Recommended Uses For Product | Modeling |
| Special Feature | Air Drying |
| Included Components | 1 x Art and Craft |
| Educational Objective | Dexterity, Hand-Eye Coordination, Creative Skill |
| Model Name | DAS Air Hardening Modeling Clay |
| Item dimensions L x W x H | 12.3 x 6.6 x 8.6 inches |
| Global Trade Identification Number | 08000144074105 |
| Manufacturer | Dixon Ticonderoga |
| Item Weight | 2.2 pounds |
| Product Dimensions | 12.3 x 6.6 x 8.6 inches |
| Item model number | F387500 |
| Is Discontinued By Manufacturer | No |
| Material Type | Clay |
| Manufacturer Part Number | F387500 |
Have a Question? See What Others Asked
Reviews
J**A
Great for my small business
I use this stuff to sculpt onto pretty much everything for my small business: clay pots, canvases, recycled glass bottles, and more!Tips:1. Cracking...so you can't really prevent it. But there are east ways to fix it. For example, My process for sculpting faces is simple. I work in sections. First the nose. Then the eyebrows, cheeks, lips ect...make sure to smooth your seams with A WET PAINTBRUSH... I like to dip my brushed in water then wipe them off on a sponge.Now, let your project dry for at least two days in a low humidy area. In that time, Your project will most likely crack or separate at the seams. At this point, you should make a very thick paste with your clay and use a paintbrush to fill in the cracks and smooth it out as if you were using caulking.Let your project dehydrate completely before sanding, priming, painting and sealing.2. It's important to work in sections and smooth out any imperfections while the clay is still wet with a paint brush or sponge to prevent cracking or crumbling anywhere other than the seams around the sections.Working in sections also prevents other parts of your project becoming dry and clumpy before you can add any further details. You'll understand what I mean once you work with it more.3. To make your clay easier to work with...remove the block from the original package and place it in a zipper top bag. Now, and about a tablespoon of water. No more, and possibly less depending on how moist your clay arrives. Let the block sit with the bag sealed for at least an hour, drain any excess water then begin your project by taking pieces from the bag and reasaling it each time you go for a new piece. You will eventually find your preferred texture the more you get to know how to clay behaves.4. Painting and sealing....I can't stress enough how dry your clay needs to be to successfully create a project that will last. Don't rush it! No matter how dry the clay seems, I can assure you that there is still moisture in there! While your Paint might go on really nicely at first, it will most likely peel off a week later or even sooner if you place it outside because the moisture in the clay began to wick it's way to the surface.I recommend that you follow the steps above for fixing any cracks and then after two days of room temperature drying, place in your oven at 200°-250° for at least 2hours. More or less depending on how thick your project is. The point in this is to dehydrate the clay completely. Then, let cool in the oven. DO NOT TAKE IT OUT RIGHT AWAY! Wait until it's warm enough to take out then WHILE ITS STILL WARM/HOT...I REPEAT...WHILE ITS STILL WARM/HOT... spray/brush on a good sealing primer. Making sure to get in all the crevices! This will prevent the clay from absorbing any moisture out of the air. Trust me. Any bit of moisture will ruin your paint job in the long run. Add two to three coats of primer before painting.5. Sealing...seal small projects with deco art glaze and bigger outdoor project such as pots with Rust-Oleum crystal clear enamel.Hope this helps!
A**T
Quality product!!
Yes!! This is the one! Here's your sign!! Great to use for molds. Dries hard, so you won't be able to do any molding after it dries. But the detail is remarkable. A beige-y color, not white after drying. Paintable .. just love it
P**S
My daughter loves it
Always have to keep purchasing this for my creating 10 years old this a must have my household! Easy to clean after her mess ! It last a long time.
S**7
When it drys it cracks i added water to keep it wet to work with it
My first time using air-dry clay and sculpting a kitty face in bowl and i love it so far im now using my homemade incense holder
L**.
Great Air Dry Clay!
This air-dry clay is very nicely packaged and is pliable and soft for crafting. It has good moldability and rolls out very well for use in DIYS. I recently used "sheets" of it to wrap around styrofoam balls to create a charming snowman on my crafting channel!
P**R
This is a must buy for fun projects!
This clay is amazing! it works sooo well and has some great colors, its pretty soft too! its been some of the best air dry clay I've ues, definitely worth your money (:
A**.
Love this clay!
I love this clay. Very good quality. A lot of the artists on YT recommend this clay. I believe it to be good quality from my limited usage. No clay is exempt from cracking because that can be a result of many things, adding too much water , drying too fast, too thick without proper use of armature, inconsistent thickeness can mean inconsistent drying etc. But this is easily fixable. Make a slip and patch it. Its sandable! Mostly slow dry it, loosely cover with plastic and keep out of direct air current and keep an eye on it's drying process.This clay is so versatile. I mostly use polymer and air dry is a new challenge. But I am enjoying the switch up. I can paint it and seal it without worrying about reaction with the clay like you do either polymer. I can paint with acrylic or even acrylic gouache and then seal with a spray. You just have to test if any paint markers will run (Sometimes Poscas will run if I've outlined something in black). I found I can do the lightest of spray and let that dry and then build up another layer of spray lightly. It's nice for my little sculpts or magnets and pins. You can also use resin but I prefer spray or brush on sealer.
K**E
Yeah
Honestly great. I don't have much experience but from my perspective it was wonderful. Light cracking, but can be fixed with a little water and love.
Common Questions
Trustpilot
3 weeks ago
2 weeks ago
